
So, Carnarvon Gorge has taken pole position on your bucket list. But now what?
Figuring out how to make the most of your visit can be a real challenge, especially if you’re a first-time visitor.
Allow me to break it down for you. If you’re an avid bushwalker, and aren’t afraid to clock up some Ks then read on. This itinerary will show you how to pack the bulk of the Gorge’s highlights into just 3 days!
Can’t squeeze three days into your trip? Don’t panic! I’ve prioritised these experiences for you. Just start with Day 1, and take it from there!
Day One – The Lower Gorge: the quintessential Carnarvon Gorge experience.

In a nutshell:
- Art Gallery
- Ward’s Canyon
- Amphitheatre
- Moss Garden
The details:
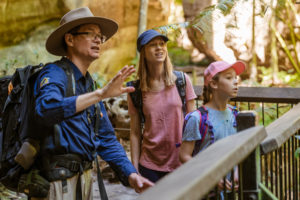
This 14 km full day walk is, without a doubt, the most popular self-guided walk at Carnarvon Gorge. And for good reason, these four major sites are totally unique. Simply put, you won’t find another walk at the Gorge with this level of diversity. Even local tour operators have been using this exact same itinerary for over twenty years! They must be onto something!
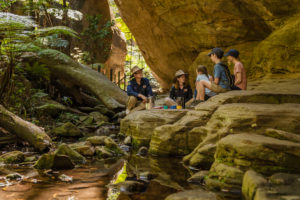
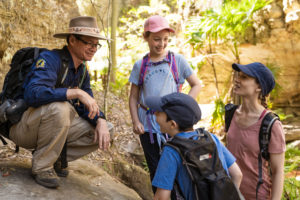
Head to the Art Gallery first, which is a site of great significance to the Traditional Custodians, the Karingbal and Bidjara people. Here, you’ll encounter over 2000 motifs including stencilled, engraved and free hand rock art, dotted along an equally impressive section of sandstone. There is a lot to absorb at this spiritual site, so be sure to allow plenty of time to take it all in.
Next up, is Ward’s Canyon. Home to the one and only colony of King Ferns we know of in inland Australia. There’s a bit of a climb involved, but I can assure you the natural air conditioner will be working like a charm, making this the perfect lunch stop.
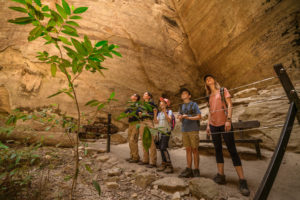
After some R & R, continue on to the Amphitheatre, where you’ll be blown away by the grandeur of the soaring cliffs. Many visitors feel a great sense of reverence here that they can’t easily explain. See for yourself. You can’t help but fall in love with the place.
And finally, pay a visit to the Moss Garden. Arguably the best known, and most photographed site at Carnarvon Gorge. It’s where you’ll find one of the best patches of remnant rainforest, and one of the most productive spring systems in the National Park. Day in, day out, water constantly drips from the moss covered walls. An experience not to be missed.
TOP TIP: Walk to your furthest destination first. Why, you ask? Well, firstly, it means you’ll be knocking off the single biggest chunk of walking when it’s cool and you’re fresh. Secondly, as the day warms up you’ll be breaking up the return walk into smaller, more manageable chunks, progressively getting closer and closer to home. And finally, the rock art is far more impressive in full shade, so the earlier you can view it, the better!
Day Two – Take it easy: explore the mouth of Carnarvon Gorge.

In a nutshell:
- Nature Trail
- Boolimba Bluff
- Rock Pool
- Mickey Creek & Warrumbah Gorge
The details:
As tempting as it may be to succumb to tired and heavy legs following a big day up the track, try and tackle at least one of these short walks to ward off any tightening of muscles.
The Nature Trail is a great option at any time of day, but is particularly special at dawn, offering ample wildlife encounters, including the elusive platypus. Plus, there’s a good chance you’ll have it all to yourself at this hour. 1.5 km return.
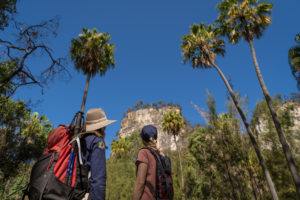
If you’re feeling particularly sprightly then continue onto Boolimba Bluff, an incredible lookout walk that offers spectacular views of the Gorge mouth and beyond. You’ll climb close to 1000 stairs in order to reach the top, so this one is best done in the morning when you’re fresh. 6.4 km return.
The walk in to the Rock Pool is only 200 metres, but that doesn’t make it any less special. This is the perfect spot for a leisurely picnic lunch or an afternoon swim. 400 m return, or 4 km return from the Day Use Area.
Finally, pay a visit to Mickey Creek and Warrumbah Gorge. Two separate side gorges, each with their own unique character, offering some of the narrowest landscape experiences at Carnarvon Gorge. It can, however, remain quite cool inside even on the warmest of days, so plan to visit during the warmest part of the day. The further you venture in, the more rock-hopping you’ll be required to manage, and more important good balance becomes. 3 km return.
TOP TIP: When visiting Mickey’s Creek and Warrumbah Gorge, wear a pair of old shoes you don’t mind getting wet. You’ll be able to explore far deeper into each side gorge if you commit to getting wet feet!
Day Three – The Upper Gorge: tackle the longer walks at Carnarvon Gorge.

In a nutshell:
- Cathedral Cave
- Boowinda Gorge
- Big Bend
The details:
Get started early, and set a good pace, as you’ll be retracing some of your steps from Day one. But once you pass the Art Gallery turn-off you’ll be in uncharted territory, so slow down, take in your surroundings, and enjoy the fact that only 40% of walkers make it this far, making for a much quieter walk. Plus, the further you venture into Carnarvon Gorge, the narrower it becomes, which makes for some pretty epic cliff scenery.
There are three key sites on today’s itinerary, and it really doesn’t matter which order you visit them in, as they’re all within 500 metres of each other. Though, it’s worth bearing mind that the first site is 9.6 km into your walk, so there’s not much time to dilly dally.
First up, you’ll meet Cathedral Cave, which is another significant rock art site, with a few key differences, including unique motifs not found anywhere else, and a remarkable overhang that shelters the entire site!
Just next door you’ll find the gem that is Boowinda Gorge. It’s not hard to see where creation being, Mundagarra (Rainbow Serpent), has travelled when exploring this sinuous side gorge. It’s quite rocky underfoot, and takes some metal focus to stay upright, but it’s definitely worth the effort!
Last, but not least, Big Bend… the end of the line. And what a place for it to end! Not only is this beautiful bend in Carnarvon Creek a site worth visiting in its own right, it’s also a designated campsite, meaning there are a few creature comforts to take advantage of: a toilet, picnic table, and lovely beach. If you started early enough you should have ample time to kick your boots off, have a nap, and recharge the batteries for your 10 km return walk.
TOP TIP: Resist the urge to sleep in today … this is one of those walks you really must start early to ensure you have enough daylight to return before dark.
Getting excited about exploring Carnarvon Gorge?
I sure hope so, and now that you have a plan of attack, you’re in a great position to make the most of your next visit to Carnarvon Gorge.
And remember, you’ll be making a huge journey to get here, and it may even be a once in a lifetime experience. So, start early, maximise the limited daylight hours, and spend as much quality time in the Gorge as possible. It’s far more exciting than your campsite, I promise you!
Want to know more?
Click HERE for an in-depth run-down of Carnarvon Gorge’s walking trails.
Download the official Carnarvon Gorge Visitor Guide and start planning your next visit.
Explore our FAQ Page for more information and tips.
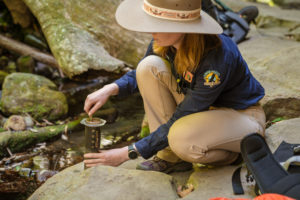
Did you know that Carnarvon Gorge Eco Tours runs Day One as a guided tour? Check out our Lower Gorge Explorer for more information.

Thanks!